- Introduction
- Examples
- How it works
- Caveats
- Prerequisites
- Step 1 - Create Storybook project
- Step 2 - Configure Storybook with Elm through elm-webpack-loader
- Step 3 - Install your Elm project in Storybook
- Step 4 - Create your first Hello World Elm story
- Step 5 - Mount a view from your Elm app
- Step 6 Add other states for view
- Step 7 Add other viewports for view
- Conclusion
Introduction
You’re working on an Elm app that has a home page which loads blog articles from an API feed and lists them. The page has a type “Status” with three states, “Loading”, “Loaded”, and “Failed”, and for each of these states something different in the UI should happen to alert the user about the current state. For “Loading”, a spinner is shown, for “Failed” an error message is shown, and for “Loaded” the page displays the retrieved blog articles.
type Status a
    = Loading
    | Loaded a
    | Failed
The business requirements of the app require it to be responsive supporting mobile, tablet-portrait, tablet-landscape, and desktop viewports. Looking at the home page you see that it’s going to be a pain to maintain it. The markup for each state will need to look good across four viewports and that makes twelve possible combinations of viewport and state.
Thinking about this some more you figure you can get this working for all viewports and states by just using dev tools for the viewports and then manually setting state in the Elm development environment. Going forward though, the next person who needs to make some UI change is gonna have to go through the pain of navigating the app and using dev tools for all the viewports.
There’s a better way to do handle this, and it’s by creating a Storybook workspace and mounting the Elm app in it. In this article I’m going to describe using Storybook with Elm, when it is and isn’t a good idea, and then show a step by step implementation where I’ll mount Richard Feldman’s Elm SPA example into Storybook.
You can take the views of any Elm app and “mount” them in Storybook UI explorer then create different stories in Storybook that allow you to see the same view in a multitude of different viewport sizes and states. The benefit of this is that it makes it really easy to see how fixes and changes are affecting the visual UI of the view. Rather than having to launch dev tools, pick the right viewport setting, and then going through app functionality to get to the desired state, the combinations of viewport and state of a single view can be represented as a navigable menu where each can be inspected quickly by a click.
- What does the form look like when there is a validation error for mobile users?
- How does the forms visual appearance change when a user is adding a new record vs. editing an existing one?
- What does the list look like when text is overflowing?
- If I add some padding for the desktop view is it going to break the design for tablet in portrait orientation?
- Is the detail page looking okay if dynamic information is empty?
- Before we deploy the new feature can we do a quick check to see how this looks across safari, firefox and chrome?
Storybook is an essential tool that I use for developing the views for WingTask my Elm app. During the course of setting up Storybook so that I could develop discrete components in Elm, I stumbled upon creating a workflow where all of the actual Elm views for WingTask are available as stories in Storybook, and it’s been so handy I’d like to show you how to do it.
Storybook is a tool for UI development. It makes development faster and easier by isolating components. This allows you to work on one component at a time. You can develop entire UIs without needing to start up a complex dev stack, force certain data into your database, or navigate around your application.
Examples
How it works
Storybook has a concept called a Story. A Story is a function that gets rendered in the navigation of Storybook’s UI and it renders the result of the function in an iframe called the “canvas”.
Storybook is written in React and that’s not important, what is important is that it’s built with webpack and so basic Elm support is a matter of setting up elm-webpack-loader like any other Elm project built with webpack.
Where this tutorial is going to go a step further than just basic Elm support in Storybook is to show how any Elm app can be integrated in Storybook so that Stories for different viewports and states can be created where the Elm app is initiated and loaded into the Storybook iframe. Further state can be injected into the App so that a specific view can be mounted at a particular state.
In this tutorial I’ll demonstrate doing this with Richard Feldmans RealWorld Elm SPA example. I developed this technique while working on my own Elm app WingTask and I find it is a game changer for making UI work easier and consistent. However I recognize this might not be for every Elm app, and hopefully this tutorial can give a good overview about what’s involved.
To be clear this is mostly about static views User interface and it’s probably not going to help much with state change interactions like animations and definitely not for general Elm app development and debugging.
Elm and Storybook might be a great idea
- You are supporting responsive design for multiple viewports (mobile, tablet, desktop, etc.).
- You have views with many possible states.
- You want to build a design system.
- You want a front end style guide.
- You want to allow non Elm staff to work on the UI without having to setup a full Elm dev environment.
- You want to use web components.
- You want to the ability to quickly check your UI across different browsers .
Maybe Elm and Storybook is not worth it
- You don’t want to alter the Elm app code in any way to make this happen
- You don’t want to couple your state changes in views to Storybook.
- Creating fake data for the views is too much work.
Caveats
- Making this work will require exposing functions and types from your view modules that might have otherwise remain unexposed good for interactive validation and certainly not for app debugging.
- Making this work will require creating fake or sample data
Prerequisites
An Elm project using Browser.application or Browser.element. (In this tutorial I show Browser.application but I’ve also done it with Browser.element which is actually the easier of the two because you don’t have to worry about the Navigation.Key of Browser.application)
In your path:
- NPM executable.
- Elm executable.
- Git executable.
Step 1 - Create Storybook project
First create an empty directory and then an NPM package.json.
$ mkdir my_storybook
$ cd my_storybook
$ npm init -y
Create a Storybook HTML type project (the project type is not important, HTML project type here is chosen arbitrarily)
$ npx --yes sb init -t html
Add styles for elm-spa-example, (this step is only necessary as part of the demo, and demonstrates how stylesheet links can be setup)
$ $EDITOR .storybook/preview-head.html
  <!-- Import Ionicon icons & Google Fonts our Bootstrap theme relies on -->
  <link href="//code.ionicframework.com/ionicons/2.0.1/css/ionicons.min.css" rel="stylesheet" type="text/css">
  <link href="//fonts.googleapis.com/css?family=Titillium+Web:700|Source+Serif+Pro:400,700|Merriweather+Sans:400,700|Source+Sans+Pro:400,300,600,700,300italic,400italic,600italic,700italic" rel="stylesheet" type="text/css">
  <!-- Import the custom Bootstrap 4 theme from our hosted CDN -->
  <link rel="stylesheet" href="//demo.productionready.io/main.css">
Remove boilerplate Storybook that won’t be used
$ rm -rf src
$ rm -rf stories/*
Step 2 - Configure Storybook with Elm through elm-webpack-loader
Create an elm.json file in the same Storybook directory (my_storybook).
$ elm init
...

Knowing all that, would you like me to create an elm.json file now? [Y/n]: Y
Install elm-webpack-loader
$ npm install --save-dev elm-webpack-loader
Configure Storybook webpack to use elm-webpack-loader. This is where it gets a little different than a typical webpack project. Storybook has a hidden directory .storybook where configuration happens.
$ cd .storybook
$ $EDITOR webpack.config.js
Add config for elm-webpack-loader. Since Storybook is for development only the debug option can be hardcoded to true.
const path = require("path");

module.exports = async ({ config, mode }) => {

  config.resolve.extensions.push('.elm');

  config.module.rules.push({
    test: /\.elm$/,
    exclude: [/elm-stuff/, /node_modules/],
    loader: 'elm-webpack-loader',
    options: {
      debug: true,
    }
  })

  return config;
};
Step 3 - Install your Elm project in Storybook
Installing the Elm project in Storybook means setting the “source-directories” in the Storybook elm.json to a path where the Elm project resides. This can be done if the Elm project is located within Storybook directory or located elsewhere in the local development environment. For this tutorial I’m going to show bringing in the Elm project as a git submodule because it has two advantages:
- As a git submodule the Elm project is setup to be worked on with changes.
- It doesn’t depend on a particular local dev setup.
Initialize Storybook directory as git repo
$ cd .. # If still in my_storybook/.storybook dir
$ git init
$ git add .
$ git commit -m "Init commit"
Add Elm project as git submodule
$ git submodule add https://github.com/rtfeldman/elm-spa-example.git
Cloning into '/my_storybook/elm-spa-example'...
remote: Enumerating objects: 1506, done.
remote: Counting objects: 100% (38/38), done.
remote: Compressing objects: 100% (36/36), done.
remote: Total 1506 (delta 4), reused 8 (delta 0), pack-reused 1468
Receiving objects: 100% (1506/1506), 830.28 KiB | 4.15 MiB/s, done.
Resolving deltas: 100% (924/924), done.
Edit my_storybook/elm.json to add Elm project to source directories
$ $EDITOR elm.json
{
  "type": "application",
  "source-directories": [
    "elm_spa_example/src"
  ],
  "elm-version": "0.19.1"
}
Install elm packages for project.
The elm.json file in Storybook will need to mirror the elm.json for the Elm app. All the same packages must be installed.
$ elm install NoRedInk/elm-json-decode-pipeline
$ elm install elm/http # Also manually set version at "1.0.0" in elm.json for elm-spa-example
$ elm install elm/json
$ elm install elm/time
$ elm install elm/url
$ elm install elm-explorations/markdown
$ elm install rtfeldman/elm-iso8601-date-strings
Create initElmStory.js
$ $EDITOR stories/initElmStory.js
initElmStory initializes an Elm Story and places it in the Storybook canvas.
// Elm initializiation with Browser.app means that any existing content inside
// a document's body tag will get replaced by Elm.
// Storybook has an expectation that story content is inside div#root which
// is a child of body. There are also some other Storybook wrapper divs that
// we want to preserve.
// 1. Clone the original body without Elm
// 2. Init elm
// 3. Clone the body with Elm.
// 4. Reinstate the original body that we cloned.
// 5. Append Elm clone to div#root.
export const initElmStory = (elmApp) => {
  const body = document.querySelector('body')
  const originalCopy = body.cloneNode(true);
  const app = elmApp.init();
  const withElmCopy = body.cloneNode(true);
  body.parentNode.replaceChild(originalCopy, body);
  const rootDiv = document.querySelector('#root');
  rootDiv.innerHTML = '';
  rootDiv.appendChild(withElmCopy);
  return document.createElement('div');
};
Step 4 - Create your first Hello World Elm story
Create my_storybook/stories/views/001_home
$ mkdir -p stories/views/001_home
Start with a boilerplate Story which is really a boilerplate Main.elm for Browser.application and name it
$ $EDITOR stories/views/001_home/Home.elm
module Main exposing (main)

import Browser
import Browser.Navigation as Nav
import Html exposing (..)
import Url


main : Program () Model Msg
main =
    Browser.application
        { init = init
        , view = view
        , update = update
        , subscriptions = subscriptions
        , onUrlChange = UrlChanged
        , onUrlRequest = LinkClicked
        }

type alias Model =
    {key : Nav.Key}


init : () -> Url.Url -> Nav.Key -> ( Model, Cmd Msg )
init _ _ key =
    ( Model key, Cmd.none )

type Msg
    = NoOp
    | LinkClicked Browser.UrlRequest
    | UrlChanged Url.Url

update : Msg -> Model -> ( Model, Cmd Msg )
update msg model =
    case msg of
        NoOp ->
            ( model, Cmd.none )

        LinkClicked urlRequest ->
            ( model, Cmd.none )

        UrlChanged url ->
            ( model, Cmd.none )


subscriptions : Model -> Sub Msg
subscriptions model =
    Sub.none


view : Model -> Browser.Document Msg
view model =
    {
        title = "This title won't show"
        , body = [ h1 [] [ text "Hello world from Elm story!" ]]
    }
Create my_stories/stories/views/001_home/_desktop.stories.js
$ $EDITOR stories/views/001_home/_desktop.stories.js
export default { title: 'views/Home/Desktop' }

import { initElmStory } from '../../initElmStory.js';
import Home from './Home.elm';

export const normal = () => {
  return initElmStory(Home.Elm.Main);
}
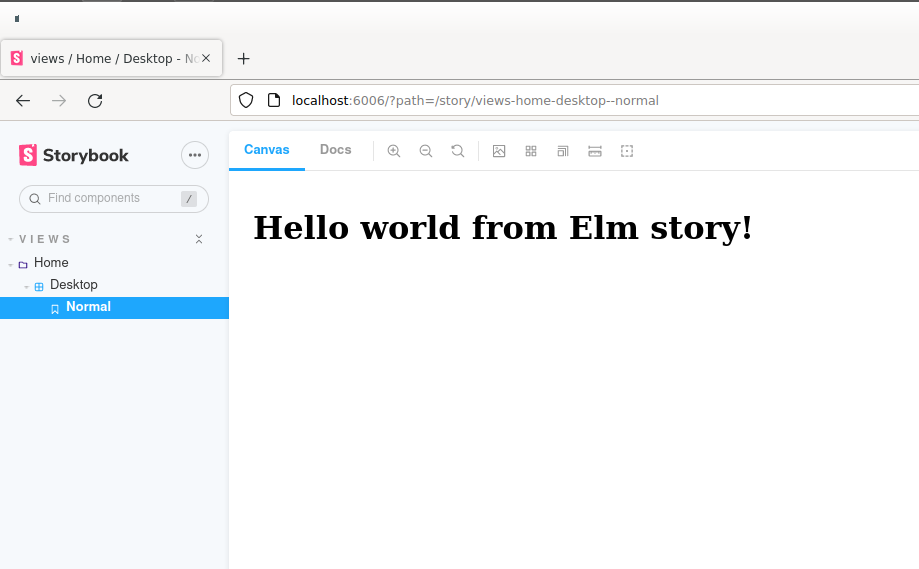
Start Storybook and verify that Hello World story renders
$ npm run storybook
You should be able to browse to http://localhost:6006, and use the side navigation
Home -> Desktop -> Normal
Step 5 - Mount a view from your Elm app
In this step I’ll demonstrate mounting a view by mounting the Home page of elm-spa-example
Rename the module in my_storybook/stories/views/001_home/Home.elm to Story.Home.
my_storybook/stories/views/001_home/Normal.elm
module Story.Home exposing (main)
Change the initElmStory argument in _my_storybook/stories/views/001_home/_desktop.stories.js to reflect the name change.
my_storybook/stories/views/001_home/_desktop.stories.js
export const normal = () => {
  return initElmStory(Normal.Elm.Story.Home);
}
Import the view module you wish to mount
my_storybook/stories/views/001_home/Home.elm
import Page.Home
_Note: If you are following along with the elm-spa-application example and receive an error at this point. Check my_storybook/elm.json for elm-http and verify that it’s downgraded to version “1.0.0”. If it’s “2.0.0”, edit it to “1.0.0”.
Step 5A Create sample data to inject into views
This step shows how to fabricate the state for views and it bears mentioning that this will be different for every Elm app depending on the structure of any particular app’s state. By manipulating the view state through fake data we can “force” the view into showing conditional UI elements.
Create directory _my_storybook/sample_data.
$ mkdir sample_data
Expose Session types in my_storybook/elm-spa-example/src/Session.elm
$ $EDITOR elm-spa-example/src/Session.elm
my_storybook/elm-spa-example/src/Session.elm
module Session exposing (Session(..), changes, cred, fromViewer, navKey, viewer)
Create FakeSession.elm
$ $EDITOR sample_data/FakeSession.elm
module FakeSession exposing (guest)

import Browser.Navigation as Nav
import Session exposing (Session(..))


guest : Nav.Key -> Session
guest key =
    Guest key
Create FakeFeed.elm
$ $EDITOR sample_data/FakeFeed.elm
module FakeFeed exposing (stub)

import Article exposing (Article, Preview)
import Article.Feed as Feed
import Browser.Navigation as Nav
import FakeSession exposing (guest)
import Json.Decode exposing (decodeString)
import PaginatedList exposing (PaginatedList)


stub : Nav.Key -> Feed.Model
stub key =
    Feed.init (guest key) articles


articles : PaginatedList (Article Preview)
articles =
    decodeString (Feed.decoder Nothing 10) sampleArticlesJson
        |> Result.withDefault (PaginatedList.fromList 0 [])


sampleArticlesJson : String
sampleArticlesJson =
    """
        {"articles":[{"slug":"Create-a-new-implementation-1","title":"Create a new implementation","description":"join the community by creating a new implementation","body":"Share your knowledge and enpower the community by creating a new implementation","createdAt":"2021-11-24T12:11:08.212Z","updatedAt":"2021-11-24T12:11:08.212Z","tagList":["implementations"],"author":{"username":"Gerome","bio":null,"image":"https://api.realworld.io/images/demo-avatar.png","following":false},"favoritesCount":992,"favorited":false},{"slug":"Explore-implementations-1","title":"Explore implementations","description":"discover the implementations created by the RealWorld community","body":"Over 100 implementations have been created using various languages, libraries, and frameworks. Explore them on CodebaseShow.","createdAt":"2021-11-24T12:11:07.952Z","updatedAt":"2021-11-24T12:11:07.952Z","tagList":["codebaseShow","implementations"],"author":{"username":"Gerome","bio":null,"image":"https://api.realworld.io/images/demo-avatar.png","following":false},"favoritesCount":633,"favorited":false},{"slug":"Welcome-to-RealWorld-project-1","title":"Welcome to RealWorld project","description":"Exemplary fullstack Medium.com clone powered by React, Angular, Node, Django, and many more","body":"See how the exact same Medium.com clone (called Conduit) is built using different frontends and backends. Yes, you can mix and match them, because they all adhere to the same API spec","createdAt":"2021-11-24T12:11:07.557Z","updatedAt":"2021-11-24T12:11:07.557Z","tagList":["welcome","introduction"],"author":{"username":"Gerome","bio":null,"image":"https://api.realworld.io/images/demo-avatar.png","following":false},"favoritesCount":413,"favorited":false}],"articlesCount":3}
    """
Expose decoder in my_storybook/elm-spa-example/src/Article/Tag.elm
$ $EDITOR elm-spa-example/src/Article/Tag.elm
my_storybook/elm-spa-example/src/Article/Tag.elm
module Article.Tag exposing (Tag, decoder, list, toString)
Create _FakeTag.elm_

``` shell
$ $EDITOR sample_data/FakeTag.elm
module FakeTag exposing (stubList)

import Article.Tag exposing (Tag, decoder)
import Json.Decode as Decode exposing (decodeString)


stubList : List Tag
stubList =
    decodeString (Decode.field "tags" (Decode.list decoder)) response
        |> Result.withDefault []


response : String
response =
    "{\"tags\":[\"welcome\",\"implementations\",\"codebaseShow\",\"introduction\"]}"
Edit my_storybook/elm.json to add sample_data to source directories
$ $EDITOR elm.json
{
  "type": "application",
  "source-directories": [
    "elm_spa_example/src",
    "sample_data"
  ],
  "elm-version": "0.19.1"
}
Import Time, FakeSession, FakeFeed, and FakeTag to Story.Home
my_storybook/stories/views/001_home/Home.elm
module Story.Home exposing (main)

import Browser
import Browser.Navigation as Nav
import FakeFeed
import FakeSession
import FakeTag
import Html exposing (..)
import Main exposing (Model(..))
import Page.Home as Home
import Time
import Url
Step 5B Create model for view
Expose FeedTab types, Status types, Model, and Msg in my_storybook/elm-spa-example/src/Page/Home.elm
$ $EDITOR elm-spa-example/src/Page/Home.elm
my_storybook/elm-spa-example/src/Page/Home.elm
module Page.Home exposing
    (FeedTab(..)
    , Model
    , Msg
    , Status(..)
    , init
    , subscriptions
    , toSession
    , update
    , view
    )
Import FeedTab types, Status types, Model, and Msg to _my_storybook/stories/views/001_home/Home.elm
$ $EDITOR stories/views/001_home/Home.elm
my_storybook/stories/views/001_home/Home.elm
module Story.Home exposing (main)

import Browser
import Browser.Navigation as Nav
import FakeFeed
import FakeSession
import FakeTag
import Html exposing (..)
import Page.Home as Home exposing (FeedTab(..), Model, Status(..))
import Time
import Url
Create function homeModel in _my_storybook/stories/views/001_home/Home.elm
$ $EDITOR stories/views/001_home/Home.elm
my_storybook/stories/views/001_home/Home.elm
type alias Model =
    { key : Nav.Key }

homeModel : Nav.Key -> Home.Model
homeModel navKey =
    { session = FakeSession.guest navKey
    , timeZone = Time.utc
    , feedTab = GlobalFeed
    , feedPage = 1
    , tags = Loaded FakeTag.stubList
    , feed = Loaded (FakeFeed.stub navKey)
    }
Step 5C Create Msg for view
Expose Model types, Msg, and view in my_storybook/elm-spa-example/src/Main.elm
$ $EDITOR elm-spa-example/src/Main.elm
my_storybook/elm-spa-example/src/Main.elm
module Main exposing (Model(..), Msg, main, view)
Import Main and Model types to _my_storybook/stories/views/001_home/Home.elm
$ $EDITOR stories/views/001_home/Home.elm
my_storybook/stories/views/001_home/Home.elm
module Story.Home exposing (main)

import Browser
import Browser.Navigation as Nav
import FakeFeed
import FakeSession
import FakeTag
import Html exposing (..)
import Main exposing (Model(..))
import Page.Home as Home exposing (FeedTab(..), Model, Status(..))
import Time
import Url
Add type HomeMsg to Msg in _my_storybook/stories/views/001_home/Home.elm
$ $EDITOR stories/views/001_home/Home.elm
my_storybook/stories/views/001_home/Home.elm
type Msg
    = NoOp
    | LinkClicked Browser.UrlRequest
    | UrlChanged Url.Url
    | HomeMsg Main.Msg
Add branch for HomeMsg to case statement in update
$ $EDITOR stories/views/001_home/Home.elm
my_storybook/stories/views/001_home/Home.elm
update : Msg -> Model -> ( Model, Cmd Msg )
update msg model =
    case msg of
        NoOp ->
            ( model, Cmd.none )

        LinkClicked _ ->
            ( model, Cmd.none )

        UrlChanged _ ->
            ( model, Cmd.none )

        HomeMsg _ ->
            ( model, Cmd.none )
Step 5D Inject model into view
Use homeModel function to inject page state into Main.view, map it to HomeMsg, and render it as the document body.
$ $EDITOR stories/views/001_home/Home.elm
my_storybook/stories/views/001_home/Home.elm
view : Model -> Browser.Document Msg
view model =
    let
        pageModel =
            Home (homeModel model.state model.key)

        { body } =
            Main.view pageModel

        content =
            div [] body
    in
    { title = "Home - Desktop"
    , body = [ Html.map HomeMsg content ]
    }
Step 6 Add other states for view
Modify initElmStory to accept a state argument and pass it to Elm as flags in the init.
$ $EDITOR stories/initElmStory.js
// Elm initializiation with Browser.app means that any existing content inside
// a document's body tag will get replaced by Elm.
// Storybook has an expectation that story content is inside div#root which
// is a child of body. There are also some other Storybook wrapper divs that
// we want to preserve.
// 1. Clone the original body without Elm
// 2. Init elm
// 3. Clone the body with Elm.
// 4. Reinstate the original body that we cloned.
// 5. Append Elm clone to div#root.
export const initElmStory = (elmApp, state) => {
  const body = document.querySelector('body')
  const originalCopy = body.cloneNode(true);
  const app = elmApp.init({flags: state});
  const withElmCopy = body.cloneNode(true);
  body.parentNode.replaceChild(originalCopy, body);
  const rootDiv = document.querySelector('#root');
  rootDiv.innerHTML = '';
  rootDiv.appendChild(withElmCopy);
  return document.createElement('div');
};
Pass a state argument ‘normal to the normal function in my_stories/stories/views/001_home/_desktop.stories.js
$ $EDITOR stories/views/001_home/_desktop.stories.js
export default { title: 'views/Home/Desktop' }

import { initElmStory } from '../../initElmStory.js';
import Home from './Home.elm';

export const normal = () => {
  return initElmStory(Home.Elm.Story.Home, 'normal');
}
Import Json.Decode in Story.Home
my_storybook/stories/views/001_home/Home.elm
module Story.Home exposing (main)

import Browser
import Browser.Navigation as Nav
import FakeFeed
import FakeSession
import FakeTag
import Html exposing (..)
import Json.Decode as Decode
import Main exposing (Model(..))
import Page.Home as Home
import Time
import Url
Create type State in Story.Home.
my_storybook/stories/views/001_home/Home.elm
type State
    = Normal
    | Loading
    | Error

type alias Model =
    { key : Nav.Key }
Add state to Model in Story.Home.
my_storybook/stories/views/001_home/Home.elm
type State
    = Normal
    | Loading
    | Error

type alias Model =
    { state : State, key : Nav.Key }
Create stateDecoder in Story.Home.
my_storybook/stories/views/001_home/Home.elm
type alias Model =
    { state : State, key : Nav.Key }

stateDecoder : Decode.Decoder State
stateDecoder =
    Decode.string
        |> Decode.andThen
            (\str ->
                case str of
                    "normal" ->
                        Decode.succeed Normal

                    "loading" ->
                        Decode.succeed Loading

                    "error" ->
                        Decode.succeed Error

                    somethingElse ->
                        Decode.fail <| "Unknown state: " ++ somethingElse
            )
Modify homeModel to return Model based on State in Story.Home.
my_storybook/stories/views/001_home/Home.elm
homeModel : State -> Nav.Key -> Home.Model
homeModel state navKey =
    case state of
        Error ->
            { session = FakeSession.guest navKey
            , timeZone = Time.utc
            , feedTab = GlobalFeed
            , feedPage = 1
            , tags = Failed
            , feed = Failed
            }

        Loading ->
            { session = FakeSession.guest navKey
            , timeZone = Time.utc
            , feedTab = GlobalFeed
            , feedPage = 1
            , tags = LoadingSlowly
            , feed = LoadingSlowly
            }

        Normal ->
            { session = FakeSession.guest navKey
            , timeZone = Time.utc
            , feedTab = GlobalFeed
            , feedPage = 1
            , tags = Loaded FakeTag.stubList
            , feed = Loaded (FakeFeed.stub navKey)
            }
Modify init to decode flags in Story.Home.
my_storybook/stories/views/001_home/Home.elm
init : Decode.Value -> Url.Url -> Nav.Key -> ( Model, Cmd Msg )
init flags _ key =
    case Decode.decodeValue stateDecoder flags of
        Ok state ->
            ( Model state key, Cmd.none )

        Err _ ->
            ( Model Normal key, Cmd.none )
Add two functions for additional states loading and error.
Create my_stories/stories/views/001_home/_desktop.stories.js
$ $EDITOR stories/views/001_home/_desktop.stories.js
export default { title: 'views/Home/Desktop' }

import { initElmStory } from '../../initElmStory.js';
import Home from './Home.elm';

export const normal = () => {
  return initElmStory(Home.Elm.Story.Home, 'normal');
}

export const loading = () => {
  return initElmStory(Home.Elm.Story.Home, 'loading');
}

export const error = () => {
  return initElmStory(Home.Elm.Story.Home, 'error');
}
You should be able to navigate to the new states.
Step 7 Add other viewports for view
In this step flags will be used to initialize the Elm Story so that it shows a different state for the same view.
Create tablet viewport in Storybook.
$ $EDITOR stories/views/001_home/_tablet.stories.js
export default {
  title: 'views/Home/Tablet',
  parameters: {
    viewport: {
      defaultViewport: 'tablet'
    }
  }
}

import { initElmStory } from '../../initElmStory.js';
import Home from './Home.elm';

export const normal = () => {
  return initElmStory(Home.Elm.Story.Home, 'normal');
}

export const loading = () => {
  return initElmStory(Home.Elm.Story.Home, 'loading');
}

export const error = () => {
  return initElmStory(Home.Elm.Story.Home, 'error');
}
Create large mobile viewport in Storybook.
$ $EDITOR stories/views/001_home/_large_mobile.stories.js
export default {
  title: 'views/Home/LargeMobile',
  parameters: {
    viewport: {
      defaultViewport: 'mobile2'
    }
  }
}

import { initElmStory } from '../../initElmStory.js';
import Home from './Home.elm';

export const normal = () => {
  return initElmStory(Home.Elm.Story.Home, 'normal');
}

export const loading = () => {
  return initElmStory(Home.Elm.Story.Home, 'loading');
}

export const error = () => {
  return initElmStory(Home.Elm.Story.Home, 'error');
}
Create small mobile viewport in Storybook.
$ $EDITOR stories/views/001_home/_small_mobile.stories.js
export default {
  title: 'views/Home/SmallMobile',
  parameters: {
    viewport: {
      defaultViewport: 'mobile'
    }
  }
}

import { initElmStory } from '../../initElmStory.js';
import Home from './Home.elm';

export const normal = () => {
  return initElmStory(Home.Elm.Story.Home, 'normal');
}

export const loading = () => {
  return initElmStory(Home.Elm.Story.Home, 'loading');
}

export const error = () => {
  return initElmStory(Home.Elm.Story.Home, 'error');
}
Conclusion
This tutorial demonstrates how to integrate Elm with Storybook using elm-spa-example. How much work this will be for any particular Elm app will come down to the particular difficulting of creating a fake state for that app. Storybook is a flexible tool and it allows the developer to pick any arbitrary structure of organization, in this tutorial I showed a structure of view to viewport to state but of course that could be changed.